Friday, August 21, 2015

A 'dyschefull' of Apple Snowe - a hauntingly delicious dessert from medieval England

Pin It

England was on its very best 'green and pleasant land' behaviour for our recent visit - all blue skies and sunshine. We spent Sunday morning visiting the ancient bones of Henry VIII’s ship, the Mary Rose, in Portsmouth (wow, by the way – what a feat of marine archaeology!). However, there was a wailing and a gnashing of teeth when himself missed out on a change of plan and had to forego his much anticipated, post-sightseeing ye-olde-traditional-English-country-pub-Sunday-roast-dinner-with-all-the-trimmings.

He was like a dog with two tails when we got an unexpected invite to a delicious traditional-English-homecooked-Sunday-roast-dinner-with-all-the-trimmings… on the following Tuesday… in the garden of a gorgeous 350 year-old cottage, (complete with ghost, or so it is rumoured).

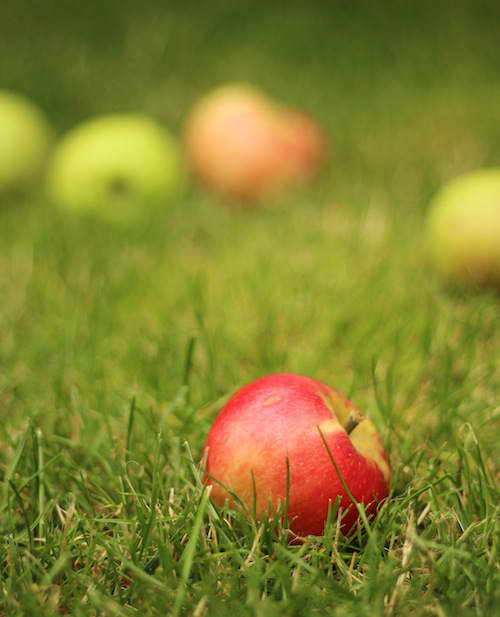
Leaving with very contented stomachs, we were further delighted to receive a bag of organically grown apples plucked from the two heavily-laden trees in the garden – one, deliciously zingy, rosy-cheeked eaters; the other, tart, green-skinned cookers. For some reason, Apple Snow sprang to mind immediately. This is a dyschefull the Tudors - perhaps even the bold Henry himself - would have enjoyed in one form or another. Maybe it was a favourite of the ghost


My version is soft meringue mixed with apple purée – an apple mousse if you will. You can serve it virtually fat-free as in this recipe, or fold in swirls of whipped cream and yet more apple purée  A drizzle of honey or maple syrup over the top won’t hurt if the apples you use are a little on the tart side. Scoop it up with shortbread fingers or langue de chat biscuits.

Note: As the meringue is so lightly cooked, it should not be given to pregnant women, infants, or anyone with a compromised immune system.


Drop the prepared apple slices into water with a generous squeeze of lemon juice to stop them going brown

First, to make the apple purée you will need…

900g apples, uncooked weight, sliced (this was 8 medium apples, after peeling and coring. I dropped them into cold water with a generous squeeze of lemon juice to stop them going brown until I was ready to use them.)
50g caster sugar or honey
the zest (in slices) and juice of a lemon (you should have about 4 tablespoons of juice)
the zest of an orange
2 whole cloves
1 stick of cinnamon
3 drops almond extract

Place all the ingredients in a large saucepan with a lid, over a medium heat. Cover the saucepan and cook the apples until soft (about 10-15 minutes) checking occasionally to make sure they haven’t boiled dry (if necessary, add a small amount of water, apple juice, or cider). When the apples are soft, remove the lid and if there is a lot of juice, continue cooking until any visible juice has evaporated.

Remove from the heat, cover, and leave to cool. Taste and add a little more sugar or honey if necessary.


Next, for the meringue you will need…
… a sugar thermometer and an electric whisk or stand mixer (or good strong muscles in your arms)

2 egg whites room at room temperature
60g caster sugar
3 tablespoons cold water
½ teaspoon vanilla extract

Place the egg whites in a bowl and whisk until fluffy and the mixture flops into soft peaks when you remove the whisk.

Place the caster sugar, water, and vanilla extract in a small saucepan and place over a medium heat until the sugar crystals have dissolved. Turn up the heat and boil the mixture until it reaches the ‘soft ball’ mark on your thermometer (or 118°C or 235°F).


Carefully remove the saucepan from the heat and drizzle the hot syrup slowly into the bowl of egg whites, whisking all the while. (Avoid drizzling the hot liquid directly onto the whisk unless you want to enamel your kitchen with molten sugar and quite possibly burn yourself into the bargain). Continue whisking until you have incorporated all the syrup, the mixture is thick and smooth and white and glossy, and a clean finger touched to the mixture tells you that the temperature has dropped to about room temperature (3 - 5 minutes).


The assembly job…

Next, remove the strips of zest, cinnamon stick and cloves from the cool apple mixture and pass it through a coarse sieve. Whisk the resulting apple purée into the meringue and chill until needed. It will keep for about 48 hours, covered, in the fridge.


When ready to serve, swirl into pretty glasses or bowls, and serve with shortbread biscuits or langue de chat. 


Pin It

Monday, June 29, 2015

Pickled Fennel – Stealing the Show

Pin It
 
Midsummer … the woodland theatre at Kilruddery House’s 17th Century gardens. Could there be a more perfect setting for Shakespeare’s A Midsummer Night’s Dream?  A light drizzle filtered through the woodland canopy and midges snacked on our ears as Titania and Oberon squabbled and Puck ran amok with a magic potion.
There was a smell of crushed grass and wet bark, mothballs and old attics as folk opened proper, wood-wormy, leather-strapped wicker baskets, quietly popped bubbly, or unscrewed interesting-looking/smelling/tasting flasks and jars. On that eerie, enchanted patch of damp grass, people shared… quietly… so as not to break the spell.
One jar that went home empty was a delicious fennel pickle. Sorry Shakespeare, it stole the show.
While I’m not the world’s greatest fan of either pickles or fennel, I can eat this fragrant crunchy pickle straight from the jar. It goes wonderfully with smoked mackerel pâté, white or oily fish­, and it has been the secret ingredient to lift a potato salad out of the ordinary.
About to get in a bit of a pickle...
 
For 1 x 500ml jar of show-stealing pickled fennel you will need…
1 fennel bulb, washed if necessary and trimmed of any blemishes
1 slice of lemon
1 fat clove of garlic sliced into about three thick slices
1 bay leaf
 
½ teaspoon whole black peppercorns
½ teaspoon whole mustard seeds
½ teaspoon whole coriander seeds
350mls white vinegar
150ml cold water
2 tablespoons each of sugar and salt
 
Slice as finely as you can...
 
Slice the fennel bulb as finely as you can then pack it into a wide-mouthed 500ml jar leaving about 2cm clear at the top. Tuck the lemon, garlic and bay leaf down the side

Pack into a wide-mouthed jar...
 
Place the peppercorns, mustard seeds and coriander seeds in a dry medium saucepan over a medium heat. When the seeds begin to pop add the rest of the ingredients.
Peppercorns, mustard seeds, coriander seeds... the supporting actors...
 
Simmer until the sugar and salt have dissolved.
Carefully pour the hot liquid over the contents of the jar until everything is submerged. Poke with a skewer or chopstick to remove any bubbles of air that have become trapped before topping up the liquid if necessary. You’ll have a bit of the pickling liquid left over. Keep it in a non-reactive container and use it to make quick cucumber pickles.
Get rid of any air bubbles...
I usually leave the pickle in the fridge for at least three days before using to allow the flavours to develop (Alchemy...) and it will keep for up to a month, covered and refrigerated.
Alchemy at work...
 
Pin It

Thursday, April 2, 2015

Hot Cross Buns – and an Invitation to Commit Gluttony (again)!

Pin It
Hot Cross Buns are traditionally eaten on Good Friday. These ones will lead you into temptation. This recipe was first published in April 2012.


As a child, one of the great treats of staying with my Gran in Cork City was that her local bakery produced great Hot Cross Buns at Easter. Maybe my taste buds are suffering from nostalgia, but I haven’t been able to find a bakery since that can produce a bun of comparable deliciousness. Many commercial versions taste like a mouthful of sawdust – a penance indeed. Experience has taught me that these Easter buns are a creation often best baked at home.
Easter is thought to be named after the Anglo-Saxon goddess of Spring, Eastre, and some believe this sweet spiced bread was baked in her honour. It makes much more sense to me that these sticky treats are a celebration of springtime and abundance to come rather than an invitation to commit Gluttony in the dying days of Lent. Whatever you believe, they are delicious.

For 12 tempting buns, you will need...
... to preheat the oven to 190°C at step 7

For the dough
500g strong white flour (bread flour)
1 teaspoon fine table salt
1 teaspoon ground cinnamon
1 teaspoon grated orange zest
1 sachet of dried yeast (7g)
1 tablespoon olive oil
75g ready-to-eat dried apricots, cut into small pieces (about the size of sultanas)
50g sultanas
75g honey*
300mls fresh milk
1 large egg, beaten 

a little extra olive oil for oiling the work surface and your hands for kneading

For the cross decoration
2 tablespoons plain flour
2 tablespoons water 

For the honey glaze
One tablespoon runny honey, warmed (I put it in a heatproof bowl and stand the bowl in hot water).
Remember that scene from Fried Green Tomatoes...
Into a large bowl, put the flour, salt, ground cinnamon, orange zest, dried yeast, olive oil, dried apricots and sultanas. Mix to combine.

*Weigh the honey directly into a small saucepan and add the milk. Warm the milk to between 27°C - 35°C (this is when a finger dipped in the milk will feel neither hot nor cold – but best to use a thermometer).

Make a well in the centre of the flour mixture and add the beaten egg, and about half the milk. Mix with a wooden spoon or spatula and continue adding the milk until you have a soft dough and no dry flour remains. You may not need to use all the milk. Continue mixing until the fruit is well distributed throughout the dough. (You could use a stand mixer with a dough hook either.)

I am shifting more and more towards the no-knead method so I simply cover the dough with a lightly oiled sheet of cling film and leave it in a warm place to rise until doubled in size. (If you prefer, knead it by hand for about 8 minutes or in your stand mixer for about 4 minutes before covering and leaving to rise.)

After the dough has risen, turn it out onto a lightly oiled work surface, and knock it back. (This simply means giving it a couple of jabs with your fists to remove most of the air so you can form it into its final shape.) Knead lightly for a minute or so, before dividing into 12 equal portions. Roll each portion into a ball on the oiled surface, and flatten slightly into a bun shape. Line a baking tray with non-stick baking parchment and gently transfer the buns to the tray. Cover the buns with lightly oiled cling film and leave in a warm place, until once again doubled in size. Make sure the buns have plenty of room to rise.


Meanwhile, make the paste for the cross by mixing together the flour and water - you want a smooth paste with a consistency similar to porridge.

When the dough has once more doubled in size, remove the cling film. Carefully pipe the cross shape onto each bun. Transfer to the pre-heated oven and bake for 10 – 12 minutes or until golden brown. Transfer the buns to a cooling rack and immediately brush them with warmed honey.

An orange blossom honey makes the perfect glaze

It is considered good luck to share these buns and the cinnamon and orange make them particularly good with coffee so what better excuse to invite some friends over! 

Lead me not into temptation... well, perhaps just the once!
Pin It

Friday, March 27, 2015

Tomato and Carrot Soup – bloomin’ luverly!

Pin It

As a small child, himself knew his great grandmother, a Victorian lady who apparently had a habit of going around with her skirt tucked into her bloomers. Her great grandson remembers that she adored tomato soup, which she would sop up with chunks of bread. I never met her, but I have a vision of a Queen Victoria-like figure schlurping up her soup, then wiping her tomato-stained gob with a lace-cuffed sleeve – a sort of Eliza Doolittle character.

I asked if the Victorian’s soup was likely to have been homemade. Himself is inclined to believe that it was tinned.

Tastes like this!

Today’s recipe is homemade… from a tin - or rather a carton. That might seem a contradiction in terms however, unless you have a fantastic supply of sun-ripened San Marzano tomatoes, you’re much more likely to get the best flavour for soups and sauces from pasata (sieved tomato pulp) or tinned tomatoes. Look for brands with a conscience and go for products with nothing added. There should only be one ingredient on the label. Tomatoes!

For 6 – 8 portions of bloomin’ luverly tomato soup you will need…
3 tablespoons extra virgin olive oil
3 carrots, finely sliced
1 onion, finely chopped
2 potatoes, peeled and finely diced (approximately 250g prepared weight)
1 fat clove of garlic, chopped
750ml pasata (or 2 x 400g tins of chopped tomatoes)
750mls chicken stock or vegetable stock
1 teaspoon of fresh thyme (or ½ teaspoon of dried thyme)
½ teaspoon sugar

salt and pepper to taste


Method
Heat the olive oil in a large saucepan over a medium heat. Add the carrot and onion. Give them a quick stir to coat them with the hot oil then turn down the heat, cover and allow to cook gently without colouring for about 8 minutes. Next, add the diced potato and chopped garlic, stir and once again, cover and this time allow them to cook for about 4 minutes.

Next add the pasata, stock, thyme and sugar. Turn up the heat until the liquid comes to simmering. Lower the heat, cover and allow to simmer gently for about 15 minutes or until the vegetables are tender.

Blend the contents of the saucepan to a smooth cream – a stick blender is perfect. Taste and add salt and pepper to suit your palate.

Serve with crusty bread.

I scattered the top of the soup with a little proscuitto and some finely chopped fresh celery leaves. 

Other toppings I like for this soup are shredded fresh basil; Parmesan croutons with fried bacon bits; or a simple swirl of crème fraiche, though I'm not beyond following the Victorian's example!


Pin It

Sunday, February 8, 2015

Lemon, Rosemary and Almond Curd - Here comes the sun!

Pin It


There’s nothing like a wet Sunday is there? It is such a contradiction in terms. Hey weather, pin back your ears. Sunday … SUN Day … geddit? Nope, obviously not listening.

Well, I can’t go for my walk, I’ve finished my book; there’s nothing to my liking on the telly. A wet Sunday is a day for pottering; for tidying; for doing things that have been put on the long finger; for remembering things I’ve promised to do but never quite gotten around to doing. I’ve just remembered I promised my sister-in-law my lemon curd recipe – eeek more than two years ago! Now would be a good time to cough up the goods.

Lemon curd is not difficult - it just needs about half an hour of your time and patience to magic a few simple ingredients into a puddle of liquid sunshine that you can turn into all sorts of deliciousness once it has cooled and set. 

Ok, you've captured a jar or two of sunshine. So now what? Well, I love it spooned into Greek yoghurt for breakfast; spread on toast; swirled through whipped cream and used to fill a meringue case, then topped with strawberries or blueberries or both, and applied to mouth. Swap it for jam... particularly in a Bakewell Tart – lemon and almond are best buddies. Use it to fill a sponge or to top a cheesecake. Make it now and you'll have it ready to take out of the fridge to spread on the crepes you’ve planned to make on Pancake Tuesday, just around the corner.  Or simply pop a spoonful in your mouth at any time for an instant good mood.
(Use unwaxed lemons or give the skins a good scrub under hot water before using.)
For approximately 500ml sunny lemon curd you will need…
250g caster sugar
75g butter, melted and cooled to room temperature
6 eggs (at room temperature), beaten
the finely grated zest and juice of 3 of the best lemons you can get your hands on (you should have 150ml juice in total)
¼ teaspoon almond extract
a sprig of rosemary, lightly bruised
a pinch of salt


Put everything in a medium saucepan over a low heat. Stir gently and constantly for about 15-20 minutes or so until the mixture has thickened to the consistency of pourable custard. At no point should the mixture boil so don't be tempted to turn up the heat to hurry the process or you'll have lemony scrambled eggs. (You could also cook the mixture in a heatproof glass bowl over - but not touching - simmering water).
Once the mixture has thickened, pass it through a sieve to remove the rosemary and the grated lemon zest. Pour into sterilized jars. It will thicken up further on cooling. Seal and refrigerate for up to a month. 
Pin It

Monday, January 12, 2015

Carrot, Coconut & Cardamom Soup... conspiring to comfort !

Pin It
  
I am studiously avoiding the bathroom scales because I know that after a Christmas of feasting it will more than likely say: “Gerroff, ya great lump!”
I got brilliant advice from a friend on how to lose weight instantly: “Turn the scales back 5kg on the 1st of January!” Unfortunately my bathroom scales are digital and they refuse to tell even the whitest of white lies. L If I’m to swap the slightly cuddlier post-Christmas me for a healthier lower-fat me ‘lite’, then it will be down to diet and exercise.

Luckily, with the turn of the year (and following multiple overdoses of chocolate truffles, mince pies, Christmas cake ...) I am craving healthy stuff – winter salads, green vegetables al dente, and soup, lots of lovely warming soup.
Today it is bitterly cold so I’m thinking... the sweetness of carrots, I’m thinking ... the warmth of cardamom ... the fresh zing of orange zest. So far, so good (tasty and reasonably healthy). However... I can’t quite leave behind the craving for richness against the harshness of winter, so I’m thinking a great big comforting swirl of nutty, creamy coconut milk.

The response from my coconut-detesting taste-tester?  “Oh ! That’s good !”
Healthy stuff...
 
For 6 - 8 portions of sunny soup that will surprise even a coconut-hater you will need...
1 tablespoon extra virgin olive (or 15g butter)
3 pods of cardamom, seeds only, crushed
½ teaspoon finely grated orange zest (orange part only)
500g carrots, (prepared weight), peeled and sliced
1 onion, finely chopped
1 small clove of garlic, crushed
750ml good quality chicken stock
1 x 400ml tin of unsweetened coconut milk
Salt and white pepper to taste 

Finely chopped coriander leaf or parsley to serve, and some crusty white bread or a delicious nutty wholemeal bread won't hurt

 
Method
Place the olive oil (or butter) into a medium saucepan over a medium heat and add the crushed cardamom seed. Fry gently for about a minute before adding the orange zest, carrots, onion and garlic. Stir to coat in the oil (or butter), then turn down the heat to low.
Cover and cook gently without colouring for about 15 minutes, stiring every few minutes (if the vegetables appear to be sticking, add a little more oil or butter and make sure the heat is low enough – if the vegetables are sizzling, the heat is too high).
Next, add the chicken stock and unsweetened coconut milk. Bring to a gentle simmer, cover, and leave to cook gently for a further 15 minutes.
Finally, puree the soup – a stick blender is the perfect tool for this job. Taste and add salt and a little white pepper if necessary.
Serve with a sprinkling of finely chopped parsley or corriander leaf, or get posh and instead serve with parsley or corriander leaf oil artfully dotted on top.
Tuck in!
Pin It

Wednesday, December 10, 2014

Chocolate Orange Mincemeat – shouts Christmas louder than a chorus of drunken carollers

Pin It


For me, chocolate and orange are the two flavours that sing out louder than a chorus of drunken carollers “Christmas is Here! Christmas is Here! “ And guess what? They absolutely love each other’s company.
This year I went through my (now dog-earred) copy of The Flavour Thesaurus and picked out other flavours that adore chocolate and like to hang out with each other as well.  

Don't be put off by the list of ingredients - it's mostly an assembly job.
See? Assembly job!

For approximately 4 jars of mincemeat, you will need...
... to pre-heat the oven to 180°C   
300g sultanas
100g ready-to-eat prunes (e.g. no stone), finely chopped
100g dried sour cherries (or dried cranberries), finely chopped
300g ready-to-eat dried apricots, finely chopped
100g mixed peel (this is finely chopped candied peel of oranges and lemons)
100g walnuts, finely chopped
220g dark brown sugar
200g grated apple (I used Granny Smiths)
125g butter, cut into cubes
finely grated zest and juice of 1 large orange
finely grated zest and juice of 1 lemon
 ½ teaspoon ground cinnamon
¼ teaspoon freshly grated nutmeg (or ground nutmeg)
5 coriander seeds, crushed (or ¼ teaspoon ground coriander)
3 allspice berries, crushed (or ground allspice, but not mixed spice)
2 whole cloves, crushed
2 teaspoons cocoa powder, sifted
1 teaspoon vanilla extract
6 tablespoons Cointreau (or other orange liqueur) + an additional 2 tablespoons to stir in at the end 

Method
Mix all the ingredients together in a large oven-proof dish with a lid. Cover and place in the preheated oven and cook gently for 3 hours, stirring every half hour or so (set a timer... )

When the cooking time has elapsed, remove from the oven and allow to cool, stirring briefly every half hour until cold. This keeps the butter evenly distributed throughout the mixture.

Finally, stir the remaining 2 tablespoons of Cointreau (or other orange liqueur) into the cooled mixture before sealing in clean, dry jars.

It will keep well for up to a year in a cool dark place or in the fridge - but I can’t really see the point in that!

With these fairy-size piece, you can eat three without a hint of guilt!
For the fairy-sized mince pies in the photos, stamp out rounds of short crust pastry using a 5cm (2 inch) scone cutter and use them to line a mini-muffin tin. Fill them to the top with the cooked, cooled mixture. Bake for about 10 minutes at 180°C. 

For regular-sized mince pies, use a 7.5cm cutter (2½ inch) for the base and a 6cm cutter (2¼ inch) for the lids. Fill, seal and bake for 20 – 25 minutes at 165°C or until a pale golden brown. Remember to poke two holes in the top of each with a sharp knife to let the steam out and stop them bursting open.


I prefer my mince pies warm from the oven (the microwave is death to pastry) with a swirl of fresh cream. A touch of Cointreau in the cream is optional.

It's snowing!
Pin It