Showing posts with label Baking. Show all posts

Tuesday, February 25, 2020

White Soda Bread with Seeds – Too Many Cooks ...

Pin It
With two cooks in the house, sometimes my mental inventory of stores doesn’t tie in with what is (or, more often, is not) in the cupboard. I’ll often be half-way through baking a cake and I’ll reach for the eggs only to find that my beloved must have made a giant omelette for breakfast because the dozen or so that were there yesterday have vanished. 
White Soda Bread with Seeds - merely a delivery device for peach jam

Today, I had a hankering for brown soda bread to go with my friend Penny’s incredible Peach Jam. There were a few obstacles in my way, namely no brown flour, and no oatmeal – the two main constituents of my brown soda bread recipe. I could have sworn there was some there last time I looked... hmmmmm.
This white soda bread was a total experiment. I added the seeds to make it seem half-healthy.
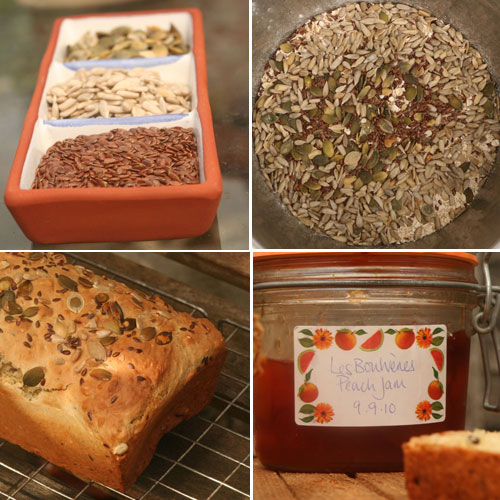
A quick and easy bread for when you're in a jam...


Soda bread is normally cooked on a baking sheet. This is quite a wet mixture so I’ve used a 2LB loaf tin.
For one 2LB loaf you will need...
...  to pre-heat your oven to 200°C

1 teaspoon olive/sunflower oil for the baking tin

Dry ingredients
500g plain flour
1 teaspoon bicarbonate of soda
1 teaspoon salt
125g mixed seeds (I used 50g pumpkin, and 25g each of brown linseed, sesame, and sunflower)

1 tablespoon runny honey
400mls buttermilk

1          Rub a 2LB loaf tin with the olive/sunflower oil.
2          Place the flour, bicarbonate of soda, salt and seeds in a mixing bowl, keeping back about a tablespoon of the mixed seeds. Stir the runny honey to the buttermilk, and add to the dry ingredients mixing just until no dry flour remains.
3          Transfer to the prepared baking tin and level the surface before scattering with the tablespoon of seeds you reserved. Place in the pre-heated oven and set your timer for 10 minutes. After 10 minutes has elapsed, lower the heat to 180°C and continue baking for a further 15 minutes.
4          Take the loaf from the oven and remove the tin. A cooked loaf will sound hollow when tapped on the base.
5          Leave to cool completely on a wire rack before slicing.

Always seek out the seed of triumph in every adversity                  ~ Og Mandino
... like making bread out of nothing when your other half has raided the stores    ~ me

As I’m writing this, my beloved has started cooking his demon chicken curry.  I wonder when he’ll discover that I’ve used the last of the yoghurt... and the cardamom... and the chillies... J
Pin It

Tuesday, January 14, 2020

Jamaican Buttermilk, Apple and Ginger Cake – resistance is futile !

Pin It
An oldie, but a goodie


When the virtue of patience was being dished out, I was too darned impatient to wait in line. If only I’d known...
... You see, the thing with Jamaican Ginger Cake is, that while it takes under an hour from start to finish, it is best wrapped and left for 24 hours for the flavours to develop.
All those spices smell so good. I know from experience that I will probably unwrap a little corner to take a peak - just to make sure the Alchemy is working... (I’ve been know to dig up seeds to see if they have started developing roots yet...).
Before you know it, I’ll be cutting a wee slice - just a taste - and that tiny taste will call for another... the irresistible warmth of the spices... the tender sticky crumb and I’ll never learn just how good it can be when I include that missing ingredient, patience!
Up the ginger quotient by increasing the amount of allspice and fresh ginger to taste. A little finely chopped stem ginger stirred into the batter also heats things up a bit.
Will I be able to resist this time? We’ll see...
For one irresistible 1 x 2lb loaf you will need...
... to preheat the oven to 160˚C
Ingredients
a little butter for greasing a 2lb loaf tin
225g plain flour
1 teaspoon bicarbonate of soda (baking soda)
1 tablespoon ground ginger
1 teaspoon ground cinnamon
½ teaspoon of ground allspice* (not mixed spice!)
½ teaspoon ground nutmeg
½ teaspoon fine table salt 
100g treacle
100g golden syrup
100g dark brown sugar
100g butter
1 tablespoon finely grated fresh ginger
1 teaspoon vanilla extract 
125mls buttermilk**
150g unsweetened stewed apple***
1 egg, beaten 

Method
Grease and baseline a 2lb loaf tin (or line with a loaf tin liner).
Place the flour, bicarbonate of soda, ground spices and salt in a large mixing bowl.
Weigh the treacle and golden syrup directly into a medium saucepan and add the sugar, butter, fresh ginger and vanilla extract and place over a low heat just until the butter has melted into the other ingredients. Remove from the heat immediately – at no point should it simmer or boil.
Meanwhile, mix together the buttermilk, stewed apple and beaten egg. Add this mixture to the flour mixture in the bowl and stir with a whisk until combined into a thick batter.
Melt, mix, stir, pour - it's that simple !

Add the warm mixture from the saucepan and whisk until combined into a smooth, fairly runny batter. Pour into the prepared loaf tin and transfer to the preheated oven.
Bake for 40 minutes or until well risen and the surface bounces back when lightly pressed. A cocktail stick inserted in the middle should come out clean, with no crumbs clinging. (Replace in the oven for a further 5 minutes if necessary and test again.)
Leave in the tin until completely cold, then remove from the tin and wrap in a layer of baking paper, then in cling film. Leave for at least 24 hours for the flavours to develop before cutting into thick slices and devouring with a decent cup of tea or coffee.
It is not the most beautiful cake in the world, but a dusting of icing sugar works wonders against the dark crumb of the cake, or you could drizzle with a water icing made according to the instructions on the packet.
 

Not the most beautiful cake in the world. A dusting of icing sugar works wonders !
*Allspice is a gorgeous warm aromatic dried berry – also called Jamaican Pepper – I grind the berries as I need them as they have a longer shelf life than ready ground – and there is the bonus of the lovely aroma they release when crushed.
Mixed spice is ... um... a mixture of spices.
**If you don’t have buttermilk, simply use the same amount of fresh milk to which you have added a generous squeeze of fresh lemon juice.
***For the stewed apple, simply peel, core and slice a large Bramley apple or similar (prepared weight approximately 200g. Place the flesh of the apple in a small saucepan with 2 tablespoons of water, apple juice or cider. Place over a medium heat. Cover and allow the apple to steam in its own juices – stirring occasionally - for about 15 minutes or until completely soft and the slices of apple can be easily mashed with a fork. Mash to a reasonably smooth puree and leave to cool before using as above.
Pin It

Saturday, November 11, 2017

Plaited Porter Bread – a loaf of plain is your only man !

Pin It


I felt sorry for the poor chefs each wrestling to turn four obstinate strands of dough into a neatly-plaited loaf, under the watchful eyes of (the acerbic) Monica Galetti and (the wincing) Michel Roux Jnr., in a recent episode of Masterchef - the Professionals.
Herding mice at the crossroads is the expression that came to mind as I watched those seemingly-inanimate strands doggedly resist all attempts to arrange them into neat, braided order.

Although it might seem like it, you don’t need four hands, a degree in juggling, and a black belt in macramé to end up with a rather impressive bread. You just need a little know-how, and to be able to count to 4. (Although, a little practice doesn’t go astray either.)
For a bread with a slightly bitter edge that's perfect with cheese, I used the best part of "a pint of plain", but you could use water instead.

For 1 plaited loaf, you will need...
Bread dough
500g strong white flour
1 x 7g sachet of fast action bread yeast
2 teaspoons salt
2 tablespoons olive oil
½ teaspoon caster sugar
330mls porter (Guinness, Murphy’s, or Beamish)

Egg wash
1 small egg, beaten, mixed with a pinch of salt

(optional) a few oats, or seeds for sprinkling over the top of the loaf (poppy, sunflower, pumpkin or sesame all work for me)

Method
Place the first 5 ingredients in a mixing bowl or stand mixer and mix to combine. Warm the porter to between 27°C–35°C. (If you don’t have a thermometer, this is when a finger dipped in the beer will feel neither hot nor cold. Too hot, it will kill the yeast. Too cold, it will just take longer to activate.)

Add the warm porter to the dry ingredients and mix until combined. If you are using a stand mixer with a dough hook, mix for about 8 minutes. If kneading by hand, knead until the dough is smooth and elastic (about 10 minutes).
Place the dough back in the bowl. Cover with some oiled cling film and leave in a warm place to rise for about an hour or until doubled in size.
Next, turn the dough out onto a floured work surface and knead for a minute or so. The dough will collapse alarmingly but don’t worry, the yeast is still working.

Divide the dough into four even pieces and roll each into a sausage shape approximately 30cm long and tapered slightly at each end.
Join the four dough ‘sausages’ at one end, with the other ends fanning out. Number the positions of the fanned ends: 1, 2, 3, 4. The number of the position doesn’t change. Every time you move a strand it takes the number of its new position.

Ok, here goes...

Cross strand 4 over strand 2. Cross 1 over 3. Cross 2 over 3.

From Top Right to Bottom Right (strands shown in their new position) :
 Fan out the dough strands; cross 4 over 2; cross 1 over 3, cross 2 over 3
Repeat the above sequence until you have a tidy plait. Tuck both ends under to neaten the loaf. Place on a lightly floured baking sheet. Cover and leave to rise once more in a warm place for about 30 minutes or until doubled in size. (To check if the dough has proved sufficiently, poke it with a finger. The indent should remain. If it bounces back quickly, let it rise for a little longer before checking again.)

When you are ready to bake, pre-heat the oven to 200°C.  While the oven is heating, brush the dough with the beaten egg. Lightly sprinkle with oats or seeds if using. Transfer to the pre-heated over and bake for 10 minutes, then turn the oven down to 180°C and continue baking for a further 15 minutes. Remove from the oven and tap the base of the bread. It should sound hollow. If not, return it to the oven for a further 5 minutes. Cool on a rack.


Pin It

Sunday, November 4, 2012

Apricot and Almond Scones – easy, lazy, delicious !

Pin It


I’m a brunch kinda gal. I’d rather skip breakfast than breakfast in a hurry so my cupboards are usually bare of boxed cereals (unless specifically bought for a recipe). So when my nieces and nephew come for a sleepover, there is usually a mad scramble to find hungry tummies something to eat in the morning. Luckily they are used to this routine by now and know that empty cupboard breakfasts can produce French toast (in about 20 minutes); buttermilk pancakes, (about the same); and that scones, while taking just a bit longer, are a fun hands-on activity, and open to all sorts of flavour customisation: apple... nutella... chocolate chip...
My latest favourite is Apricot and Almond. This mixture is easy, lazy, and delicious. Kids (of all ages) love to get involved in cutting out and glazing.  Guaranteed a big hit with little and large tummies alike.

For 8 or 9 scones you will need...
... to preheat the oven to 200
°C
150g plain flour
75g wholemeal flour
50g ground almonds
10g baking powder
¼ teaspoon fine table salt
50g butter, cut into small cubes
100g ready-to-eat dried apricots, very finely chopped
½ teaspoon almond extract (optional)
150mls fresh milk 

To glaze
1 egg, beaten (or a little milk for a less glossy finish)
a little brown or white sugar for sprinkling  

1                    Place the white flour, wholemeal flour, baking powder, ground almonds and salt in a mixing bowl. Add the butter and rub it into the flour, lifting and crumbling the mixture between your index and middle fingers and your thumbs, until it resembles fine breadcrumbs.
2                    Add the chopped dried apricots.
3                    Mix the almond extract (if using) with the milk, and pour into the bowl. Mix gently until the ingredients have formed a soft dough and no dry flour remains.
4                    Lightly flour your hands then turn the mixture onto a lightly floured work surface. Knead gently to form a ball. Pat the dough out into a round approximately 2cm thick (you could use a rolling pin for a more professional finish but I’ve found that hungry kids don’t much care for perfect symmetry).
5                    Using a 6cm (3”) cutter, stamp out scone shapes from the dough reforming any scraps into a ball and once again patting into a thickness of 2cm. This mixture yields between 8 and 9 scones.
6                    Place the prepared scones on a non-stick baking sheet and brush the tops with beaten egg. Sprinkle each with a pinch of sugar and bake in the preheated oven for 12 – 15 minutes until risen and golden brown.
7                    When cooked, remove from the oven and place on a cooling rack for about 5 minutes before serving with butter and jam. Scones are best served the day they are made but generally there are no leftovers so this won’t be a cause for concern J


Note: You could use your food processor for the first 2 steps, using whole almonds for better flavour and simply roughly chop the apricots, letting the processor do most of the work. I prefer to mix in the milk by hand as overworking the dough can make it tough.

It's called the fastest bread in the West because one moment it's there and next it's scone ...
 
Pin It

Sunday, May 20, 2012

Banana, Pear and Coconut Loaf – a reason to kiss your Greengrocer !

Pin It

My favourite Greengrocer has obviously been paying attention to my War on Waste theme. “Do you want these love, they are gone beyond the beyond.” he said, handing over several kilos of freckly bananas, and a half-dozen Rocha pears that have seen better days.  “On the house”, he adds. “I can’t sell them and it’s a shame to chuck ‘em if you can use ‘em.”  Normally I have to wait a week until my newly purchased bananas overripen sufficiently for baking. These are perfect. Oh I could kiss him.

Through a combination of a shortage of time, a lack of butter, this unexpected excess of pears and bananas, and a craving for something sweet, I have messed with my old Banana Bread recipe. Here is the new quick and easy version. WOW! The coconut adds texture and a background creaminess. The pear makes the banana flavour POP. And the bonus is that it is quicker to put together and involves less washing up. What’s not to love!
For the absolutely best results hold your nerve until the bananas are practically black on the outside and the flesh is sweet, sweet, sweet.
Not quite the pick of the bunch but these freckly bananas are just perfect for baking

For a 2Lb loaf you will need:
... to pre-heat the oven to 160°C
250g very ripe bananas, mashed (that’s about 3 medium bananas)
100g sunflower oil (or other flavourless cooking oil)
100g caster sugar
2 eggs, beaten
250g plain flour
50g dessicated shredded coconut (unsweetened)
10g baking powder
1 teaspoon ground cinnamon
½ teaspoon baking soda
½ teaspoon salt
1 soft sweet ripe pear, such as Rocha, chopped into small pieces 
a little butter to grease the loaf tin 


1                    First, lightly butter and base line a 2 lb loaf tin. (To base line a tin, sit it on greaseproof paper or baking parchment and using a pencil, trace around it. Cut out the shape just inside the pencil lines. Lightly rub the inside of the tin with butter and position the paper in the buttery base. This makes it easier to remove the cake from the tin when cooked.)
2                    In a large mixing bowl, mash the bananas roughly using a fork or a potato masher. Add the oil and caster sugar and stir together until just combined. Next add the beaten eggs, again stirring until just combined.
3                    In a separate bowl, mix together the flour, coconut, baking powder, cinnamon, baking soda, and salt and fold these dry ingredients into the egg mixture until just incorporated and no dry mix remains. (To fold, add dry ingredients to wet and taking a spatula or a metal spoon, cut through the centre of the batter. Move the spatula or spoon across the bottom of the bowl, and back up the side and across the top bringing some of the cake mixture from bottom to top. Give the bowl a quarter turn and repeat. Keep folding the mixture and turning the bowl until the dry ingredients are incorporated into the batter. Folding avoids overworking the batter, giving a tender crumb in the finished loaf.) Finally, mix in the chopped pear, making sure it is well-distributed throughout the mixture.
4                    Transfer the batter to the prepared loaf tin and place in the preheated oven. Bake for about 50 minutes or until golden brown and cooked through. A cocktail stick inserted in the centre should come out clean. If there is batter clinging to it, pop the loaf back in the oven for a further 10 minutes then test again. Leave to cool in the tin. While you can eat it straight away, this cake is best wrapped in cling film and left for 24 hours before eating. A wonderful alchemy takes place and it becomes more banana-y, pear-y and utterly delicious.  
Evidence that it is time to cut another slice...

Note: I scattered about 50g of fruit-free muesli over the top of the loaf before baking to make it more presentable because it’s a homely looking loaf. Pin It

Sunday, September 11, 2011

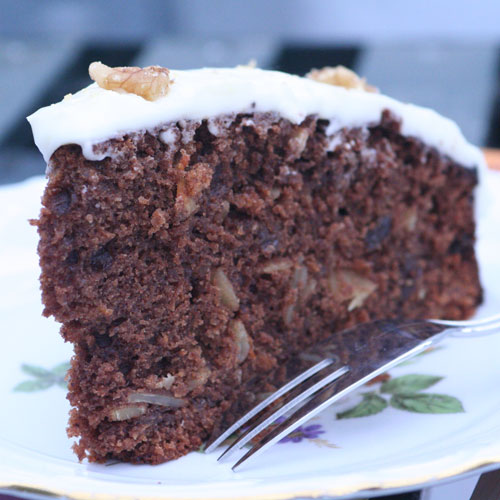
Spiced Chocolate Carrot Cake – Worth The Calories

Pin It Chocolate cake is one of the most deceitful desserts you are likely to come across in your foodie life.  Here’s how dastardly a chocolate cake can be...

I'm nuts about carrot cake...

... you are in a restaurant or café. You’ve eaten your meal and it was rather delicious and filling. You don’t really want dessert but the waitress thoughtfully brings the menu, just in case...
Sophisticated it ain't!

You hear a little voice... “Pssst! Hey you... yes you... over here!”

There, just past the apple pie, is a chocolate cake. It is calling to you. Hmmmm. You crane your neck – it can’t hurt just to have a little look. It does give the impression of being rather delicious. Is that fudge icing on top? Your eyes ignore the protests of your belly and you find yourself ordering.

It arrives, a swirl of cream on the side. You sigh in anticipation and sink your fork into the dark layers. Ack! It is dry as dust and certainly NOT WTC* (Worth the Calories). Another “all style, no substance chocolate cake” gets pushed around the plate while you wait for the bill.
Waiter! Waiter! My cake is on fire!

One cake that is unfailingly luscious is carrot cake so I have combined my usual recipe with my favourite spiced hot chocolate recipe. Sophisticated it ain’t! Worth The Calories, definitely!

For 12-14 servings you will need...
Cake Batter
350g plain flour
60g dark cocoa powder (such as Bourneville), sifted to remove any lumps
350g caster sugar
14g baking powder
1 teaspoon ground ginger
1 teaspoon ground cinnamon
100g chopped nuts (I use a mixture of almonds and walnuts)
50g raisins (or sultanas or currents)
50g dark chocolate, roughly chopped
300g finely grated carrot
4 large eggs, beaten
300mls peanut oil (or sunflower oil)
1 teaspoon vanilla extract

1                 Pre-heat the oven to 180°C.  Rub a 26cm (10 inch) round cake tin lightly with butter and line the base with a circle of baking parchment.
2                 Place the first 9 ingredients in a large mixing bowl or stand mixer.  Add the grated carrot and mix well. Add the egg and mix until combined. Finally add the oil and vanilla extract and mix well until combined into a batter.
3                 Transfer the batter to the prepared cake tin and bake in the pre-heated oven for 60 minutes or until well risen. A toothpick inserted in the centre should come out clean.
4                 Remove the cake from the oven and leave to cool for about 10 minutes in the tin. Then remove the tin and allow cool completely on a wire cooling rack.

Does spiced chocolate carrot cake count towards my five a day?

Cream Cheese Frosting
200g full fat cream cheese
100g butter, softened
700g icing sugar, sifted to remove any lumps
1 teaspoon vanilla extract

50g walnuts, chopped

1                In a large mixing bowl, beat together the cream cheese and butter until combined.
2                Add the sifted icing sugar in about 4 stages, mixing well between additions. An electric whisk is best for this task.
3                Finally add the vanilla extract and beat until the icing is thick and smooth.
4                 Spread over the cooled cake and sprinkle with the chopped walnuts.
5                 Pour yourself a mug of tea and find a quiet place where you can enjoy this cake uninterrupted.

This will keep for about a week if kept in an airtight container in a cool place.
Pin It

Friday, July 29, 2011

Mocha Walnut Cupcakes – Made with Magic Beans!

Pin It It is not every day you get to meet a man who sells magic beans. Unlike Jack (of beanstalk fame) I wasn’t taking my cow to market. I was waiting to be interviewed on the Morning Show on East Coast FM, when Stephen McCabe walked in, bringing with him a delicious aroma of freshly-roasted coffee beans.

Let them eat cake!

We got chatting and it turns out that Stephen is master roaster at McCabe’s Hand-Roasted Coffee. He had just been awarded two gold stars for his espresso – McCabe’s Classic Italian Blend – this year’s top Great Taste Award from the Guild of Fine Foods. This is an outstanding achievement by any stretch, but given they are a small family firm, up against some of the giants in the industry, it is doubly impressive. These are magic beans indeed. 
Dark chocolate coffee cake with a swirl of espresso frosting... about to do a disappearing act !

Stephen’s success has inspired these Mocha Walnut Cupcakes with Espresso Buttercream Frosting. I am, of course, using his magic coffee beans.

For 12 large cupcakes you will need...

150g butter, softened
100g caster sugar
50g dark Muscovado sugar (or any dark brown sugar)
3 eggs
125g plain flour
25g cocoa powder, sifted
1 ½ teaspoons baking powder
½ teaspoon baking soda (bicarbonate of soda)
1 teaspoon vanilla extract
1 tablespoon of double-strength espresso, cooled (or 1 teaspoon decent instant coffee dissolved in 1 tablespoon boiling water, then cooled)

Pre-heat your fan oven to 160°C and line a 12-hole muffin tin with cupcake papers

1                   In a mixing bowl, beat the butter together with the sugars until smoothly blended. Add in the eggs one at a time, mixing well between additions.
2                    Sprinkle in the flour, cocoa powder, baking powder and baking soda and continue beating until these dry ingredients are incorporated into the mixture.
3                   Add the cooled strong coffee and the vanilla essence and mix until incorporated.
4                   Divide the mixture between the 12 cupcake papers and transfer to the preheated oven.
5                   Bake for 18 – 20 minutes or until risen and evenly golden.
6                   Remove from the oven and transfer to a cooling rack. Leave to cool completely adding the frosting.

For the Espresso Buttercream Frosting you will need...
150g butter, softened
300g icing sugar
1 tablespoon of double-strength espresso, cooled (or 1 teaspoon decent instant coffee dissolved in 1 tablespoon boiling water, then cooled)

1                   In a mixing bowl, slowly beat the butter together with one-third of the icing sugar until smoothly blended. Add in the rest of the icing sugar and the cooled coffee and continue beating until light and fluffy. I usually set a timer for 5 minutes to ensure gorgeous light frosting.  Transfer to the frosting delivery system cupcakes using a spatula, or pipe in generous swirls and top with toasted walnuts – the perfect complement to an excellent coffee.

We're full of (magic) beans!

I’m lucky enough to live near several of the many coffee shops that sell their coffees and McCabe’s have an online shop if you live further afield. Pin It