Showing posts with label Puff Pastry. Show all posts

Monday, October 15, 2018

Apple Fudge Dumplings with Cider Cinnamon Syrup – sinful !

Pin It
Sinful!

I wonder if Eve had this dessert in mind when she was caught scrumping apples from the garden of paradise. What was her sin exactly: Nicking the apples? Fencing the stolen fruit? Getting caught before she had a chance to turn her illicit bounty into apple fudge dumplings?

I’ve asked around and it appears most of my friends would have been booted out of paradise too, having partaken of orchard-raiding in their youth. The lure of this crime wasn’t so much the prize of stolen fruit as the thrill of the dare. Don’t judge – there was nothing decent on the telly and the internet hadn’t been invented.

Anyway, now that apple harvest time is upon us, it would be a sin not to make this simple treat. Have some good vanilla ice cream standing by for a match made in heaven.

For 4 apple dumplings you will need…
… to preheat the oven to 180
˚C before you start to assemble the dumplings


Apple Fudge Dumplings
1 x 425g packet all butter puff pastry sheets (2 sheets)
4 apples (about the size of a tennis ball)
100g soft fudge, roughly chopped
75g walnuts or pecans, roughly chopped
a little milk to seal and glaze
4 whole cloves
1 tablespoon dark brown sugar
 

1.                  If necessary, thaw the pastry sheets according to the instructions on the packet.
2.                  With a sharp knife, cut a strip about 2cm wide from each pastry sheet and set aside before cutting each pastry sheet in two.
3.                  Remove the core from each apple using a corer or a sharp knife.
4.                  Combine the chopped fudge with the chopped walnuts or pecans and pack the centre of each apple with the mixture.
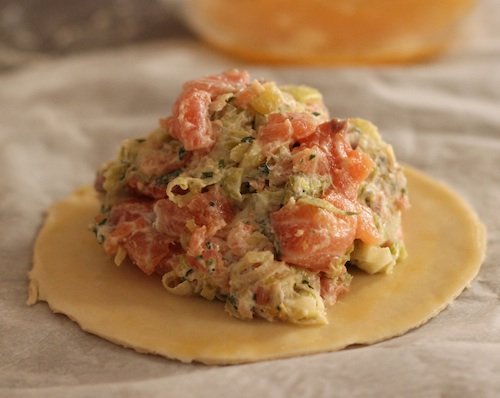
5.                  Now, place a stuffed apple in the centre of a pastry portion. Lightly brush the edges with milk and bring opposite corners together to enclose the apple. Pinch the seams to seal the pastry well or the fudge will escape as it melts. Repeat with the remaining apples.
6.                  Cut 8 oval-shapes from the pastry trimmings you made at step 3 to make 'leaves'. Brush the back of the leaves with a little milk and place two leaves on each apple. Secure with a whole clove 'stem'.
7.                  Using a sharp knife, poke two slits in the top of each apple to allow steam to escape and prevent the pastries from bursting open. Brush with a little milk and sprinkle with a little brown sugar. Bake in the preheated oven for 40 minutes or until golden and scenting your kitchen with autumnal aromas.
8.                  Leave to cool for about 5 minutes or so before serving with whipped cream, vanilla ice cream, or custard and a drizzle of the cinnamon cider syrup.


While the apple fudge dumplings are cooking make the syrup…

Cider Cinnamon Syrup
250 mls cider (or apple juice)
1 stick cinnamon, broken in half
4 tablespoons runny honey
25g butter
 

1.                  Place the cider and cinnamon stick in a small saucepan. Bring to the boil the simmer until reduced by half. Add the honey and continue to simmer for a further 5 minutes. Then add the butter, stirring until incorporated, and continue to simmer for a further 5 minutes.
2.                  Strain to remove the cinnamon. Leave to cool. Pour over the apple fudge dumplings just before serving.

 
Pin It

Monday, April 25, 2016

Fresh and Smoked Salmon & Leek Pithiviers – a posh word for pie!

Pin It
Pithivier - a posh word for pie!

A self-catering break can be a real challenge for a cook. Blunt knives and bockety pans are par for the course on a hired narrow boat, canal barge or holiday cottage and the kid behind the counter of the local corner shop will look at you oddly if you ask for anything out of the ordinary… pesto for instance.

Funnily enough, rather than putting me off cooking, the quest to produce something delicious using the simplest of ingredients, the most basic of tools, and a minimum of effort shakes me out of a rut. It reminds me to cook the style of food that is close to my heart - easy, quick and tasty.

Pithiviers fit the bill – a Pithivier is a posh word for a little puff pastry pie, filled with a sweet or savoury filling. I’ve gone for a fresh and smoked salmon and leek filling. They are perfect for lunch or dinner, hot or cold, and a delight on a picnic.

Here I have used ready-prepared puff pastry. If you have the will and wherewithal to rustle up perfect puff pastry from scratch in self-catering, you are a better person than I am.

For 4 little pies of puff pastry perfection you will need…

For the filling…
40g butter
175g young leeks, finely shredded
2 tablespoons mascarpone
1 tablespoon of fresh lemon juice
1 teaspoon finely grated lemon zest
½ teaspoon Dijon mustard
300g fresh salmon, diced into 1cm cubes
100g smoked salmon, shredded
1 tablespoon finely chopped fresh parsley
½ teaspoon freshly ground black pepper

For the shell…
A little plain flour for rolling out the pastry
450g all-butter puff pastry (ready-rolled is best if your kitchen utensils are limited)
1 egg beaten


Method
First melt the butter over a medium heat in a large frying pan. Add the shredded leeks and stir until coated in the melted butter. Reduce the heat, cover with a lid and cook gently without colouring for about 10 minutes. Remove from the heat and set aside to cool while you prepare the rest of the ingredients.

Put the mascarpone, and the lemon juice and zest in a large mixing bowl and give it a quick whisk with a fork. Mix in the rest of the filling ingredients (including the leeks once they are completely cool) until coated in the mascarpone. Cover and refrigerate until needed.

Mix...

Meanwhile on a work surface lightly dusted with flour, roll out the puff pastry to a thickness of a 1 euro coin - approximately 3mm. (If you are using ready rolled pastry just unfurl it.)

Cut out 4 circles approximately 12cm in diameter and 4 circles approximately 16cm in diameter. (The larger circles are the important ones from a presentation point of view so if you need to reroll any scraps to make up your circles use them for the smaller circles which will be underneath and hidden.) 


Pile...

Divide the salmon mixture into 4 even portions and pile a portion in the centre of each of the smaller pastry circles, leaving a margin of about 2cm all the way around. Brush each margin with a little of the beaten egg. Cover each with a large pastry circle, pressing around the edges to ensure a good seal. Trim away any excess overlapping pastry to leave a neat edge. 


Trim...


Using a small sharp knife make a small hole in the centre of each pie to let steam escape while they cook.  It is traditional to score the surface of each pie with semi-circular lines radiating out from the centre.


Score...


Refrigerate the Pithiviers until needed.

When you are ready to bake, pre-heat the oven to 180°C (fan). Place the pies on a non-stick baking tray or one lined with baking paper and brush with beaten egg before baking in the pre-heated oven for about 25-30 minutes or until risen and golden.


Share...

Serve hot or cold with a salad.


Pin It

Sunday, October 20, 2013

Camembert and Walnut Bites – accentuate the positive...

Pin It


I want to love Camembert. It looks very charming on a cheeseboard, instantly adding ze strrrrong Frrrrrrench accent. And it is always up for a picnic – just add a fresh baguette and a bottle of vin - et voila! What’s not to love? Well...
Camembert is often described as buttery and nutty – I like that bit. But to me, there is a cabbage-y tang lurking in its depths. I’m not the greatest fan of cabbage at the best of times, so why would I want it in cheese... given I’m not even the greatest fan of cheese at the best of times and will easily find an excuse to skip straight to dessert.
However... as the song says, you’ve got to ac-cen-tu-ate the positive (add buttery pastry, a touch of honey, and some walnuts) ... e-li-min-ate the negative (heat and a smidgen of rosemary seems to minimise the cabbage-y note), et voila! This I can love.

For approximately 25 party-sized bites you will need...
... a 7cm empanada press (widely and generally quite cheaply available from most kitchen stores), or a little patience.

50g walnuts
125g Camembert, cut into rough chunks
½ teaspoon very finely chopped fresh rosemary
25g runny honey
500g good quality all-butter puff pastry 

a little cold water to seal the pastries 

a little beaten egg to glaze the pastries 

Pre-heat the oven to 180°C 

First, blitz the walnuts in a food processor until reduced to large crumbs. Add the camembert and rosemary and process until reduced to a moist crumbly mixture. Add the honey and blitz to combine with the other ingredients.

If you haven't got a food processor, you will need about 5 minutes and a good chopping action

Roll out the puff pastry (or buy ready-rolled) to a thickness of about 3mm. Using the cutter side of the empanada press, stamp out circles until you have used up all the pastry. (If you don’t have an empanada press, use a 7cm round scone cutter instead.)  

Using lightly floured hands, take approximately half a teaspoon of the mixture and roll it into a ball. (This might seem a stingy amount but - trust me - any more will leak from the pastries as they cook.) Repeat until you have the same amount of cheese balls as pastry circles.

Be stingy with the filling unless you want accidental camembert and walnut crisps 

Place a pastry circle on the empanada press and place a cheese ball in the centre. Dampen the edges of the pastry with a little cold water and close the empanada press, gently sealing the cheese inside a half moon. (If you are doing this without an empanada maker, fold the pastry over the cheese ball, pressing the dampened edges together, pinching them together between thumb and index finger.) Repeat until you have approximately 25 half moons made. Kids love helping with this bit.

(I often make them to this point then freeze in a single layer to cook at a later date, straight from the freezer. If cooking from frozen, you’ll need to give them an extra minute or two in the oven.) 

Place on a baking tray, approximately 3cm apart to allow them to puff up. Bake in the pre-heated oven until risen and golden – about 10 minutes. Allow to cool slightly on a wire rack before handing round with drinks. Best served warm.


Variation: swap the honey for the same amount of apricot jam, or cranberry jelly. Both go terrifically well with Camembert. 

Pin It

Sunday, January 8, 2012

Coffee Mille Feuille – child’s play!

Pin It
Naughty breakfast!

When I was a child, my cousin Pamela had what I considered to be one of the best jobs in the world – right up there with ballerina, stunt pilot or zoo keeper. She sold pastries from a little bakery close to where my mother shopped. It would have been just plain rude not to pop in and visit when in the neighbourhood.

Pamela always had a cake for me and my brother when we stopped by to pester her say hi. Oh such agonising over what to choose! My favourites were crackly chocolate éclairs, squidgy cream doughnuts, and coffee slices, which I could separate into a thousand puff pastry layers, having licked away the vanilla cream and the coffee icing. You’ll be glad to know I’ve developed manners since and no longer dismantle my food before consuming it (well not much). Although, I did have these for simple little mille feuille for breakfast...

For 12 pastries (6 portions) you will need...
1 sheet decent quality puff pastry (250g)
icing sugar to dust


Hidden potential...


That's more like it!

For the coffee cream you will need...

250mls fresh cream
25g icing sugar, sifted
2 heaped teaspoons instant coffee granules dissolved in 2 teaspoons boiling water
1 teaspoon vanilla extract

Whisk, dissolve, sift, swirl, sigh!

Preheat the oven to 200°C
1                 Trim the edges of the pastry sheet with a sharp knife so that they are straight. Cut into 12 equal rectangles approximately 5cm (2 inches) by 10cm (4 inches). Transfer to a baking sheet lined with non-stick baking parchment.
2                 Dust generously with icing sugar and transfer to the preheated oven. Bake for approximately 8 – 10 minutes or until the pastry is well risen and golden brown and the sugar has caramelised. Transfer to a cooling rack.
3                 For the coffee cream, simply whip the cream until it forms stiff peaks when you lift the whisk out. Whisk in the icing sugar, the dissolved coffee, and the vanilla extract until combined.
4                 Split the cooled pastries and fill with the flavoured cream. Dust with icing sugar before serving with a decent brew.

Variation: Coffee is great with orange or blackcurrant. Add another flavour dimension by spreading the pastry with good quality marmalade or homemade blackcurrant jam.
Pin It

Thursday, December 15, 2011

Pastéis de Nata - Portuguese for "my day has just gotten better"!

Pin It
Pastéis de Nata - Portuguese for "my day has just gotten better"!
This week, I paid a visit to the Christmas fair lining the river banks in the lovely town of Westport, Co. Mayo. Even if I hadn’t read the signs, my nose could have found it, such were the gorgeous aromas coming from the hot food stalls. My tastebuds were mugged by a hotdog stand with a range of interesting sausages on offer – for me it had to be the lamb and rosemary sausage – my compliments to Kelly’s of Newport – delicious! I nearly cried when a passerby jogged my arm and the last bite ended up on the ground - the last bite is the best bit :(

Yum, those cupcakes look fairy, fairy delicious!
There were more cupcakes than you could shake a stick at – some simple, some with little personalities of their own. I was very tempted to have these for dessert but I’d been to Sinead Lambert and Jose Barroso's Sol Rio café in Bridge Street once before and needed one of their hot chocolates. Ok, the hot chocolate was just an excuse – the real reason was that I had developed an instant addiction to their famous Pastéis de Nata – creamy Portuguese custard tarts in a puff pastry that manages to be crisp and chewy at the same time – and it was time for another hit.

Sol Rio - a friendly welcome and great food - and don't just take my word for it,
they've a gazillion plaques on the wall, underscoring their foodie credentials
 Amy, our lovely waitress, promised me the recipe and it duly arrived in my inbox. I’ve taken the liberty of transcribing the recipe for the domestic cook and adding the traditional method of moulding the pastry shell.

For 12 highly addictive Pastéis de Nata you will need...
Puff Pastry
500g cream flour
250mls water                   
pinch of salt                    
500g butter, softened and divided into 4 equal portions

1.         To make the puff pastry: In a large bowl or stand mixer, combine the flour, water and salt until it comes together in a dough. Turn the dough out onto a lightly floured surface and roll into a rectangle about 2.5cm (1 inch) thick.
2.         Spread one portion of softened butter over the pastry, leaving a margin about a finger’s width all round. Fold the bottom third of the pastry in towards the centre, then fold the remaining third in to make a neat parcel. Brush off any excess flour and give the pastry a quarter turn. 
3.         Repeat step 2 until you have used up all the butter, making sure that every time you give the pastry a quarter turn that you are going in the same direction – helps give maximum rise.
4.         Once you have incorporated all the butter, refrigerate the pastry while you make the filling.

Custard Filling
250mls cream
zest of half a lemon – in strips rather than grated  
160g caster sugar
25g butter
25g corn flour
4 egg yolks
1 whole egg

5.         To make the filling: place the cream and the lemon zest a heavy-based saucepan over a medium heat and bring to the boil.
6.         Meanwhile place the sugar, butter and corn flour in a heatproof mixing bowl.
7.         When the cream has come to the boil, strain it into the mixing bowl, stirring to combine the ingredients. Turn the heat right down and transfer the mixture back into the saucepan.
8.         In a separate bowl, whisk the egg yolks together with the whole egg. Slowly add half the cream mixture to the eggs, whisking all the time (warning: if you add the cold eggs to the hot cream you’ll get sweet scrambled eggs - bleagh!).
9.         When you have combined approximately half the hot cream with the eggs, add this mixture to the remaining hot cream, whisking until well combined. Remove from the heat and leave to cool. Refrigerate until ready to assemble and cook the Pastéis.


Sunrise in pastry form...
Pastéis de Nata

Pre-heat the oven to 200°C

10.       To assemble the Pastéis: remove the pastry from the fridge and roll out into a rectangle about ½cm thick (¼ inch) thick.  With the long side nearest you, roll the pastry into a tight sausage. Using a sharp non-serrated knife, cut into 12 even slices and place, cut side down, in a 12-hole muffin tin (no need to butter the tin – the pastry has enough fat to stop it sticking). Using your thumbs, press the pastry out to line the tin, starting in the middle and working it up the sides. The pastry should be slightly thicker at the top.
11.       Fill with the cooled custard mixture, leaving a gap of about 1cm (½ inch) at the top. Place in the pre-heated oven and bake for 15-20 minutes until a nice golden brown on top. Decorate with icing sugar or cinnamon. Finally, make sure to invite people over or you will probably end up scoffing the lot yourself!
Ooops... couldn't resist!

Disclosure: I paid for every morsel I consumed in Sol Rio and I received no incentive to share this recipe, other than the fact that they are utterly delicious and you need to try them for yourself.
Pin It